Spaghetti with lardons in cream and garlic sauce (my carbonara)

Standard

This is a weekly staple in my household, my wife loves it. The dish is so quick and easy to make and if you don’t make your own pasta it takes seconds to prepare. It’s not a classic carbonara because it contains cream but there are classic techniques in the recipe. It’s an incredibly versatile dish that you can keep in your repertoire as a foolproof meal when unexpected guests arrive or you need a quick lunch.
Experiment with it by changing the lardons for smoked salmon, adding peas or even cooking shellfish in the cream infusing stage and scattering them around the pasta when plating up.
20131203-144638.jpg

INGREDIENTS

fresh spaghetti or tagliatelle (enough for two)
1 large free range egg
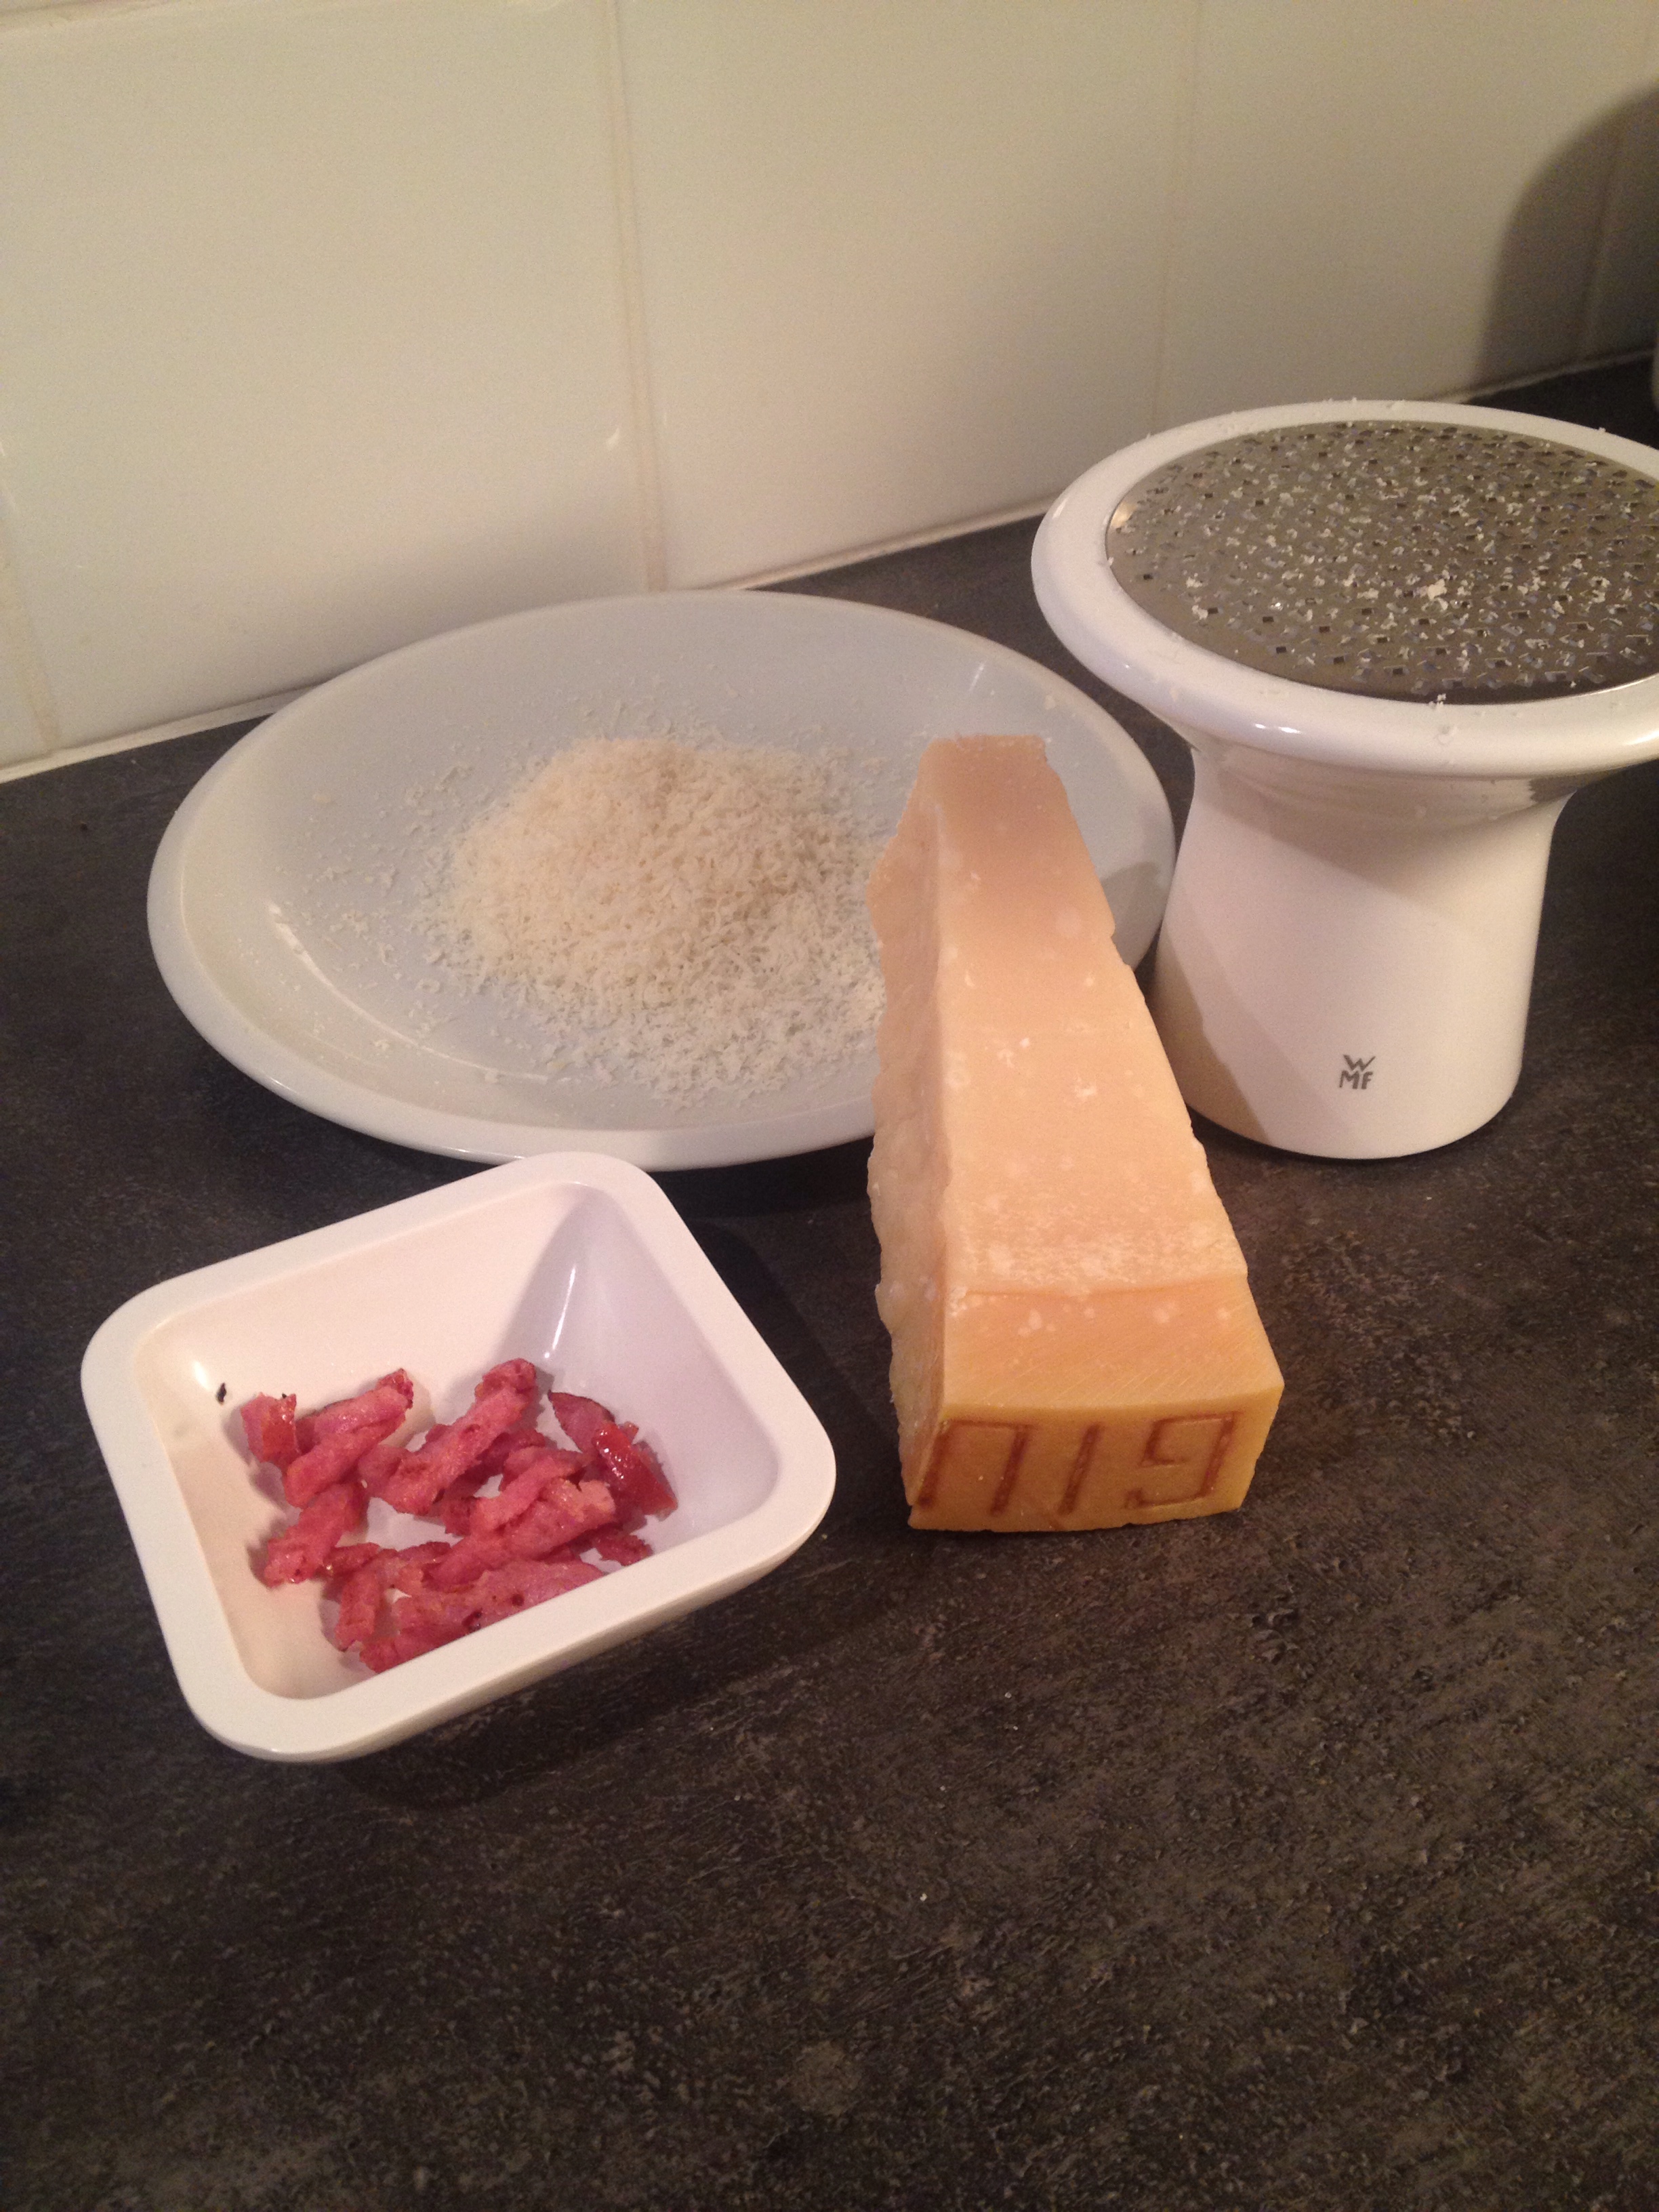
60g lardons
2 garlic cloves peeled and bashed open with the flat of a knife
125ml half fat thick cream (this is very common in France but a single cream will do)
Salt and fresh ground black pepper to season
Dried or chopped fresh basil for garnish
30g of grated Parmigiano reggiano plus extra for garnish
Glug of extra virgin olive oil
Pinch of dried thyme

METHOD

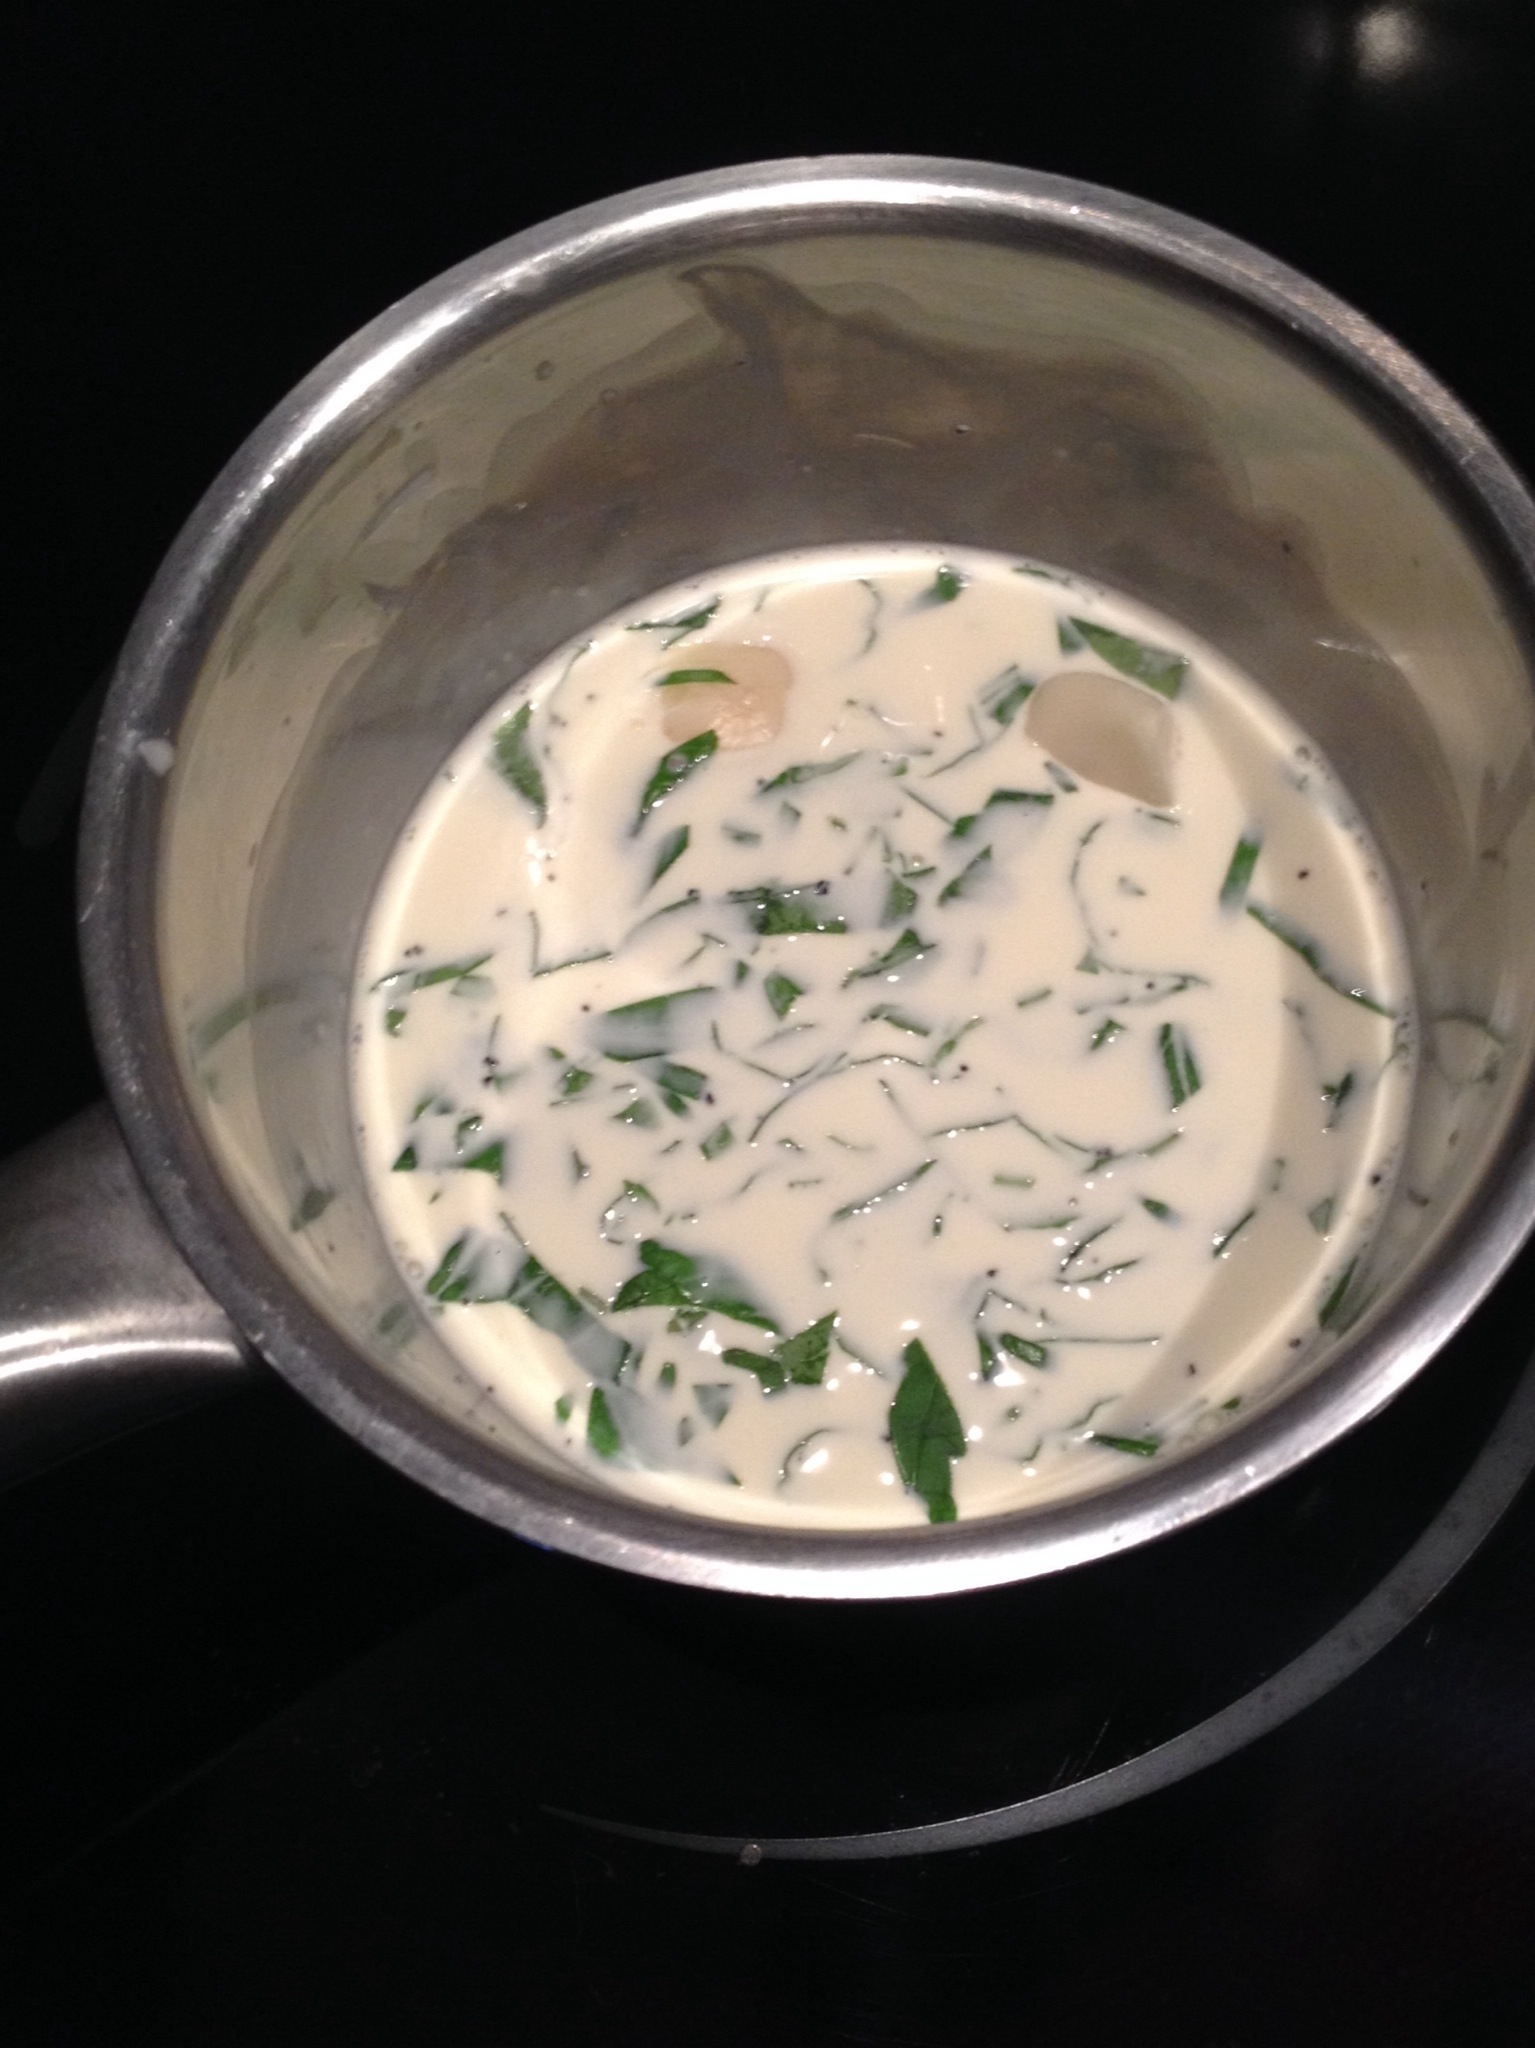
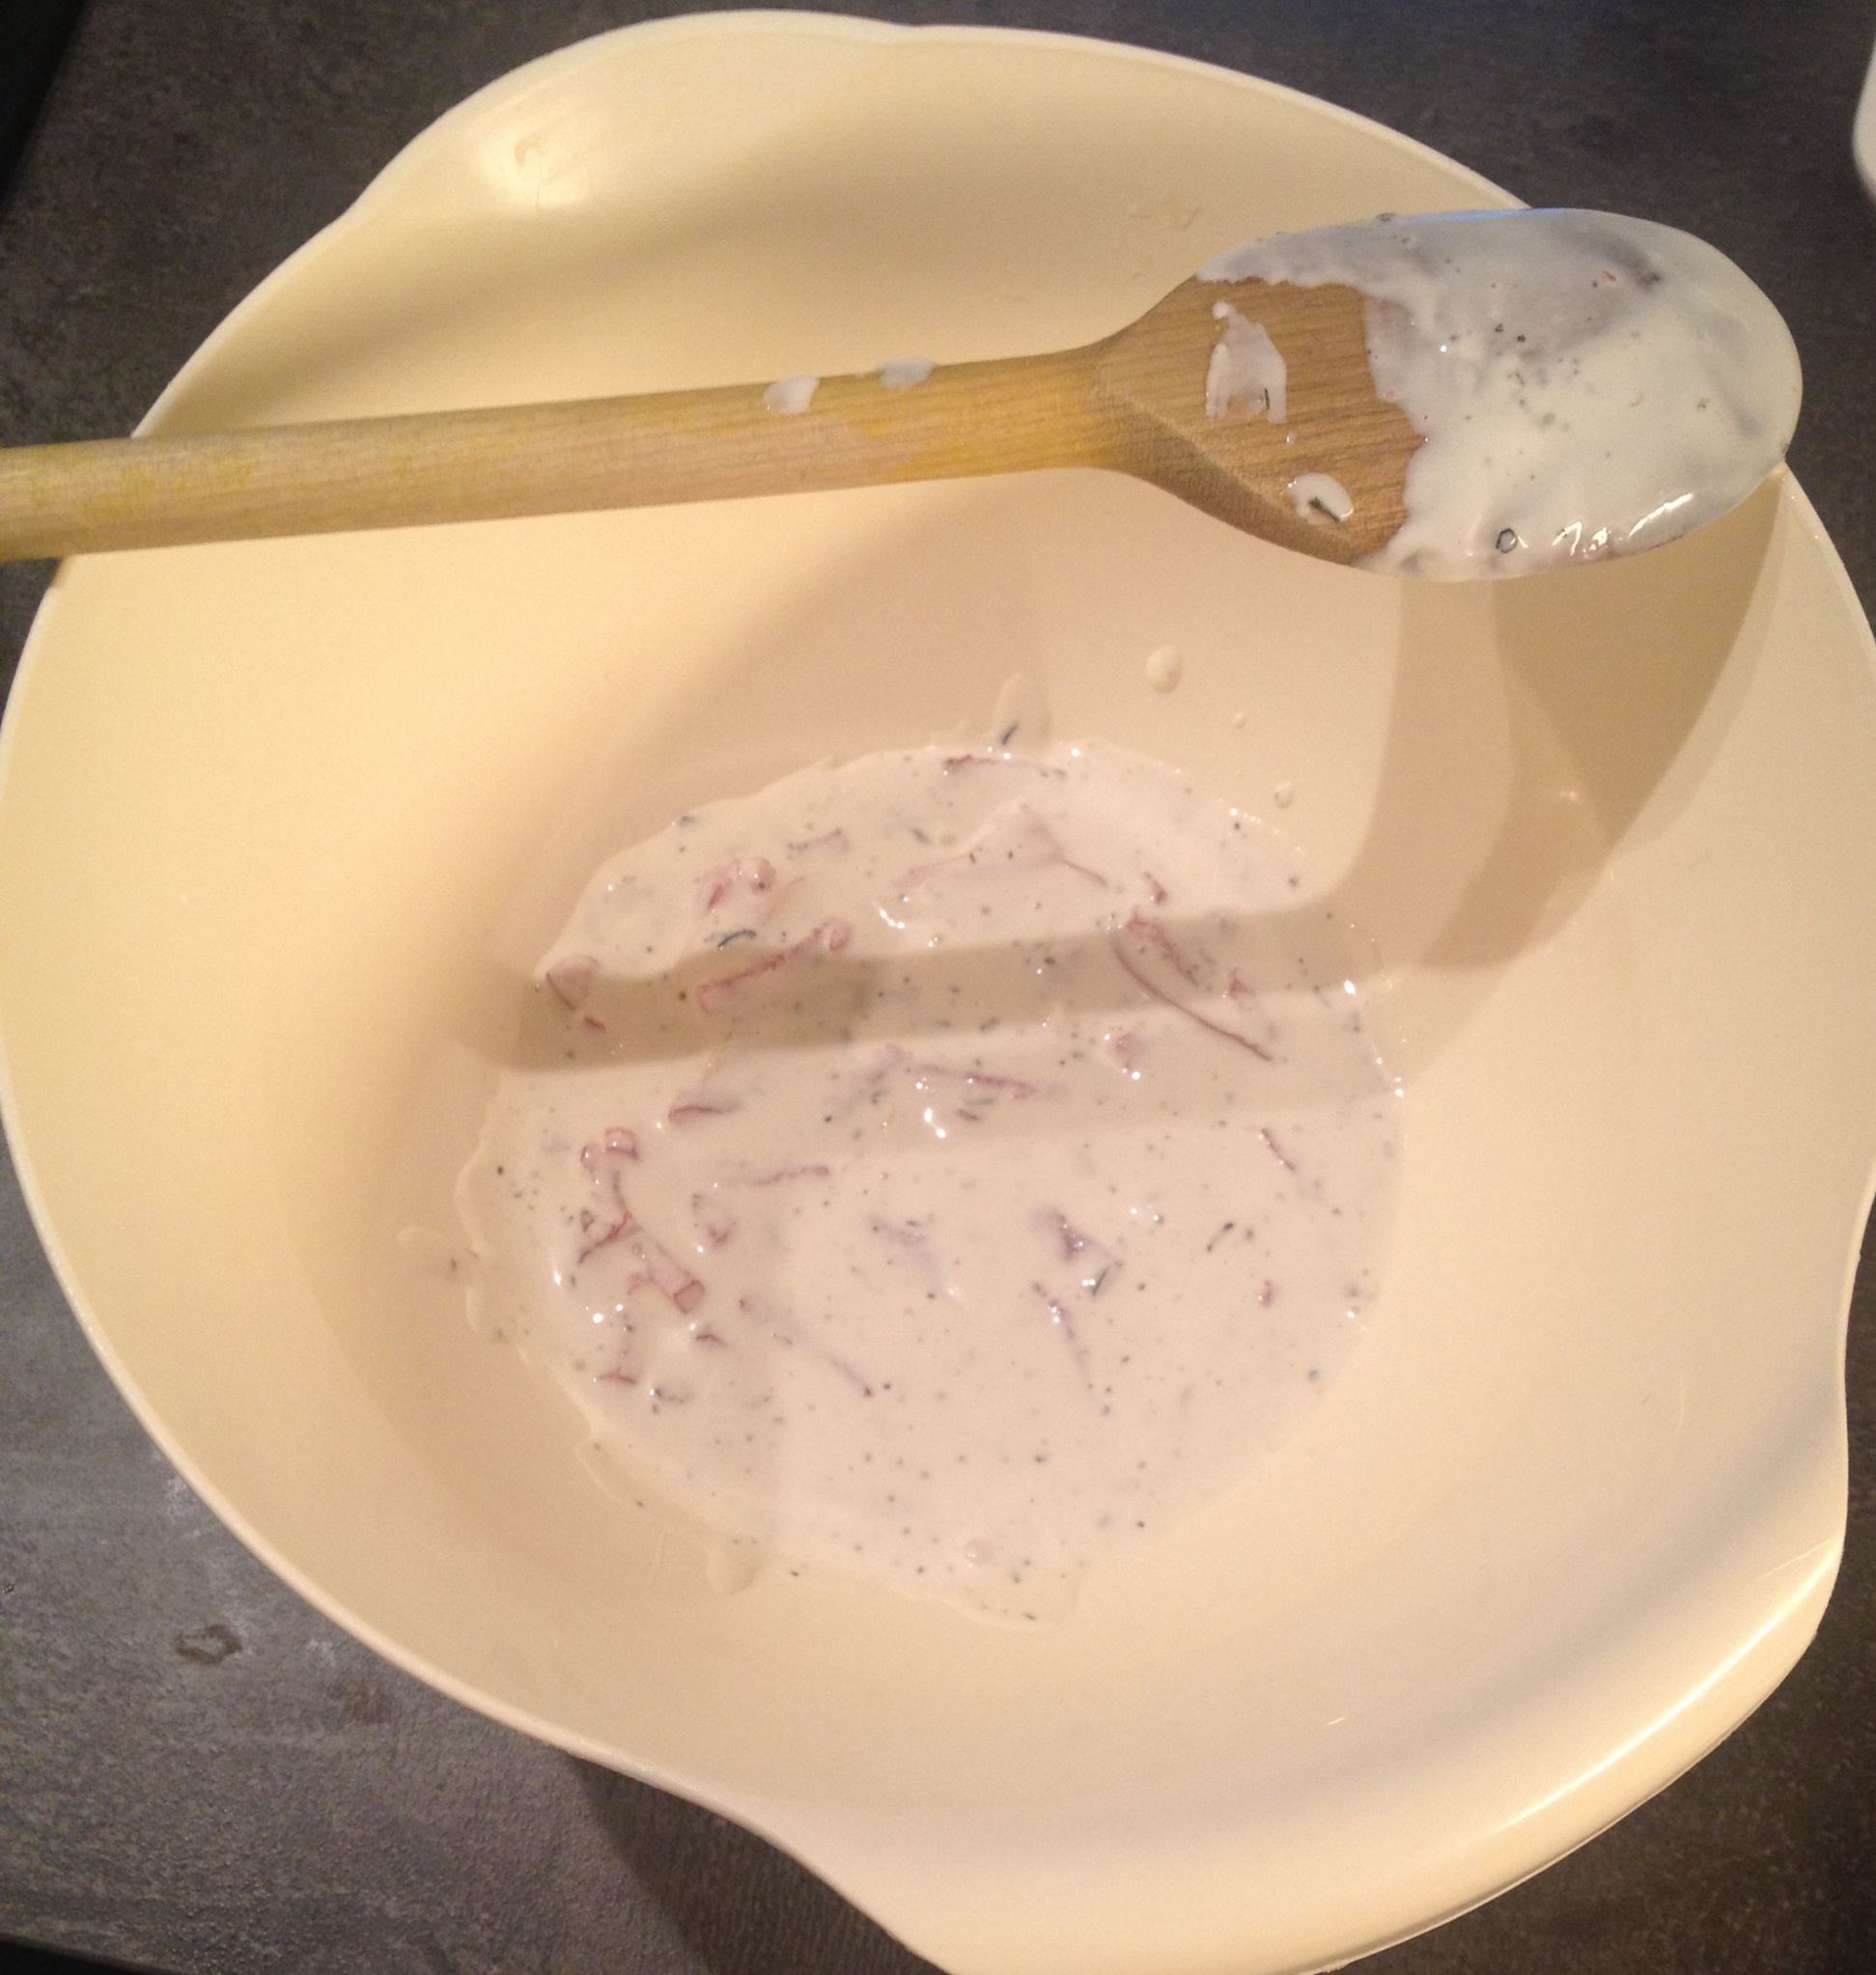
Pour the cream into a sauce pan over a low medium heat and add the garlic, thyme and season well with salt and pepper. Heat through and once hot (not boiled), remove from the heat and pour into a bowl, set aside to cool and infuse.

Heat a frying pan over a high heat with a little oil. Toss the lardons in and seal them crisp on all sides. This should only take around 2 minutes, keep them moving all the time so they don’t stick or burn.

Once sealed remove from the heat and place on kitchen paper to drain excess fat.

When free of oil, transfer the majority of the lardons to the warm cream mixture and allow to cool for around 20 minutes, save a handful for the garnish.
20131203-145200.jpg

Next take your fresh pasta out of the fridge so it can return to room temperature, this will make it easier to separate prior to cooking, fresh pasta is soft and can stick together when cooking.

Once the cream and lardon mixture has cooled remove the 3 bashed cloves and discard them. Separate the pasta and drop it into boiling water with two generous pinches of salt and cook until al dente tasting it throughout the cooking process to ensure its perfect texture and bite.

Drain the pasta but don’t discard the salty cooking water, this is essential to the dishes glossy, saucy sheen. Set the pasta aside in a sieve above the salty cooking liquid.

With an open ended whisk, crack the egg the into the cream mixture and combine, making sure not to get too much air into the mixture.

Place the pasta into a fresh pan over a low medium heat and add the cream, egg and lardon mixture, stir vigorously so not to stick and make sure not to scramble the egg, if it gets too hot lift it off the heat and then return. After one minute add a ladle of the pasta cooking water and let the mixture reduce whilst continually stirring and folding the pasta over itself.

Once the liquid is reduced by half add the grated Parmesan and stir to combine. Check the seasoning and add fresh ground black pepper at this point.

Let the liquid reduce completely but don’t let it become too dry. It should be smooth and still visible as a sauce with all the pasta coated equally. If it does go a little dry you can ladle more of the pasta water in and begin reducing again.

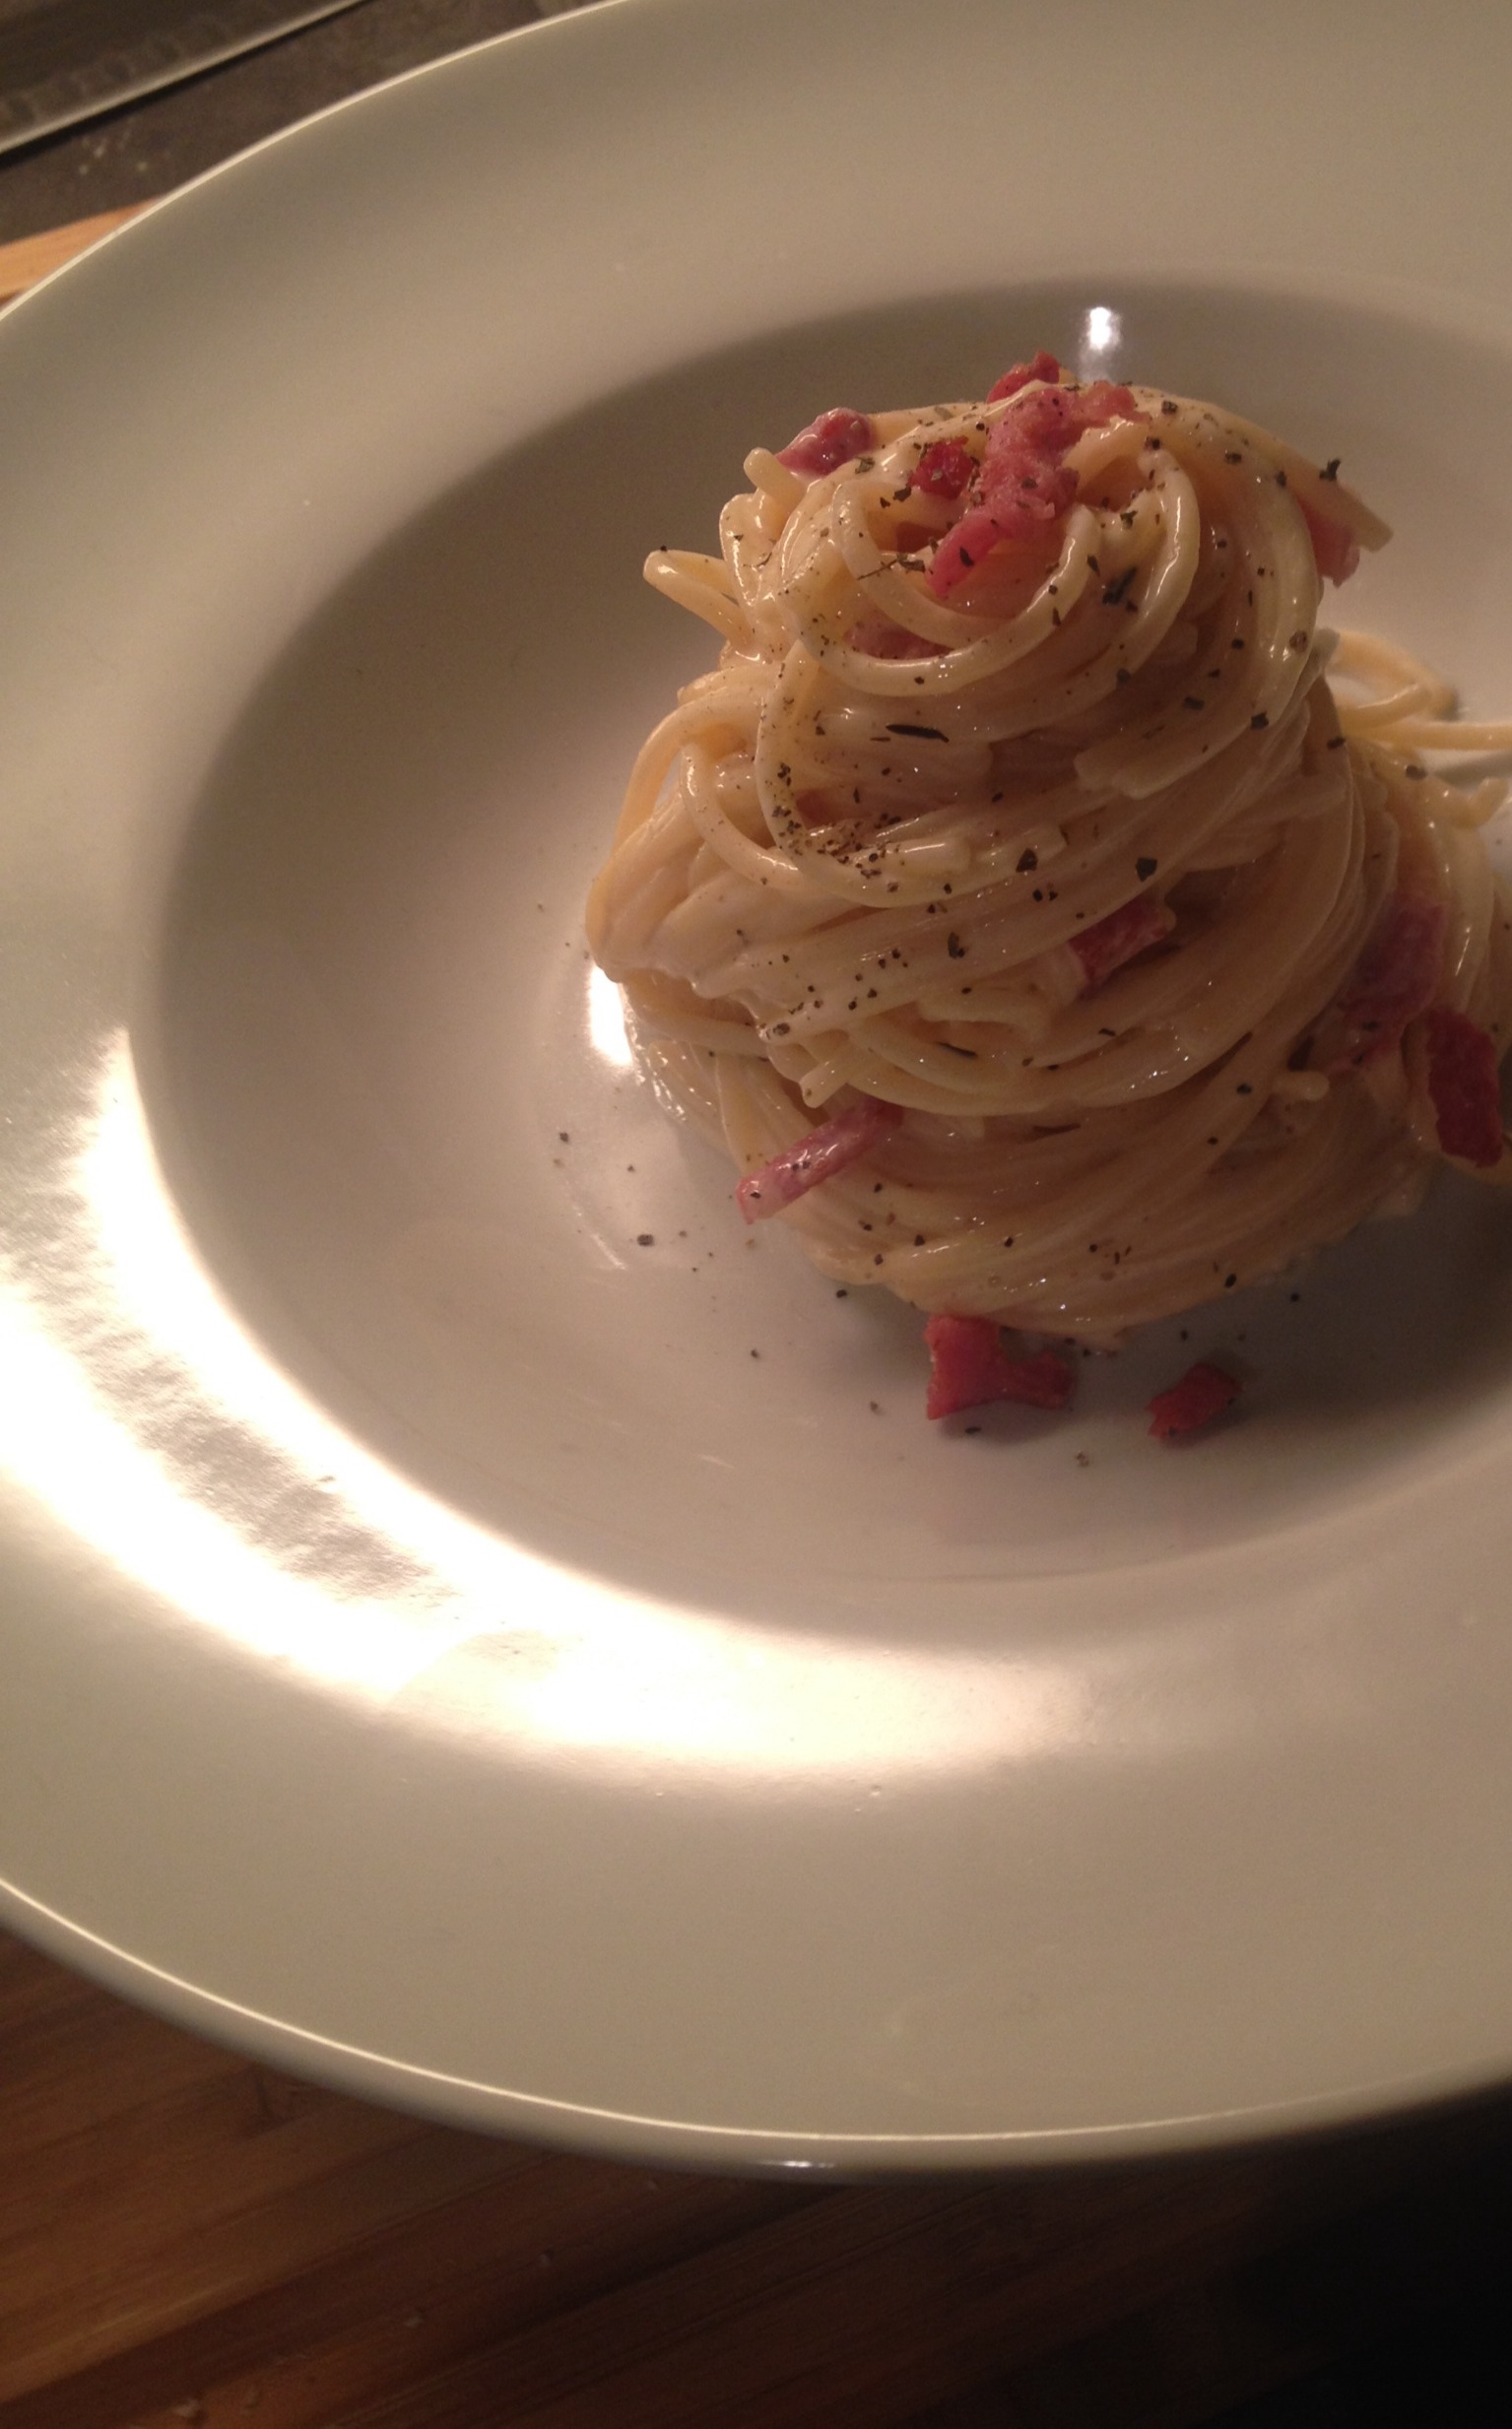
When you have the correct consistency your ready to plate up. Dig a large pasta fork or long pronged fork into the center of the pasta and turn, let the pasta wrap around the fork and keep turning until you have a portion size your happy with. Get the ladle out of the pasta water and slide it under the fork to pick the pasta up, give it a few turns in the ladle to get a nice even shape and also to give it some height.
.

20131203-134413.jpg
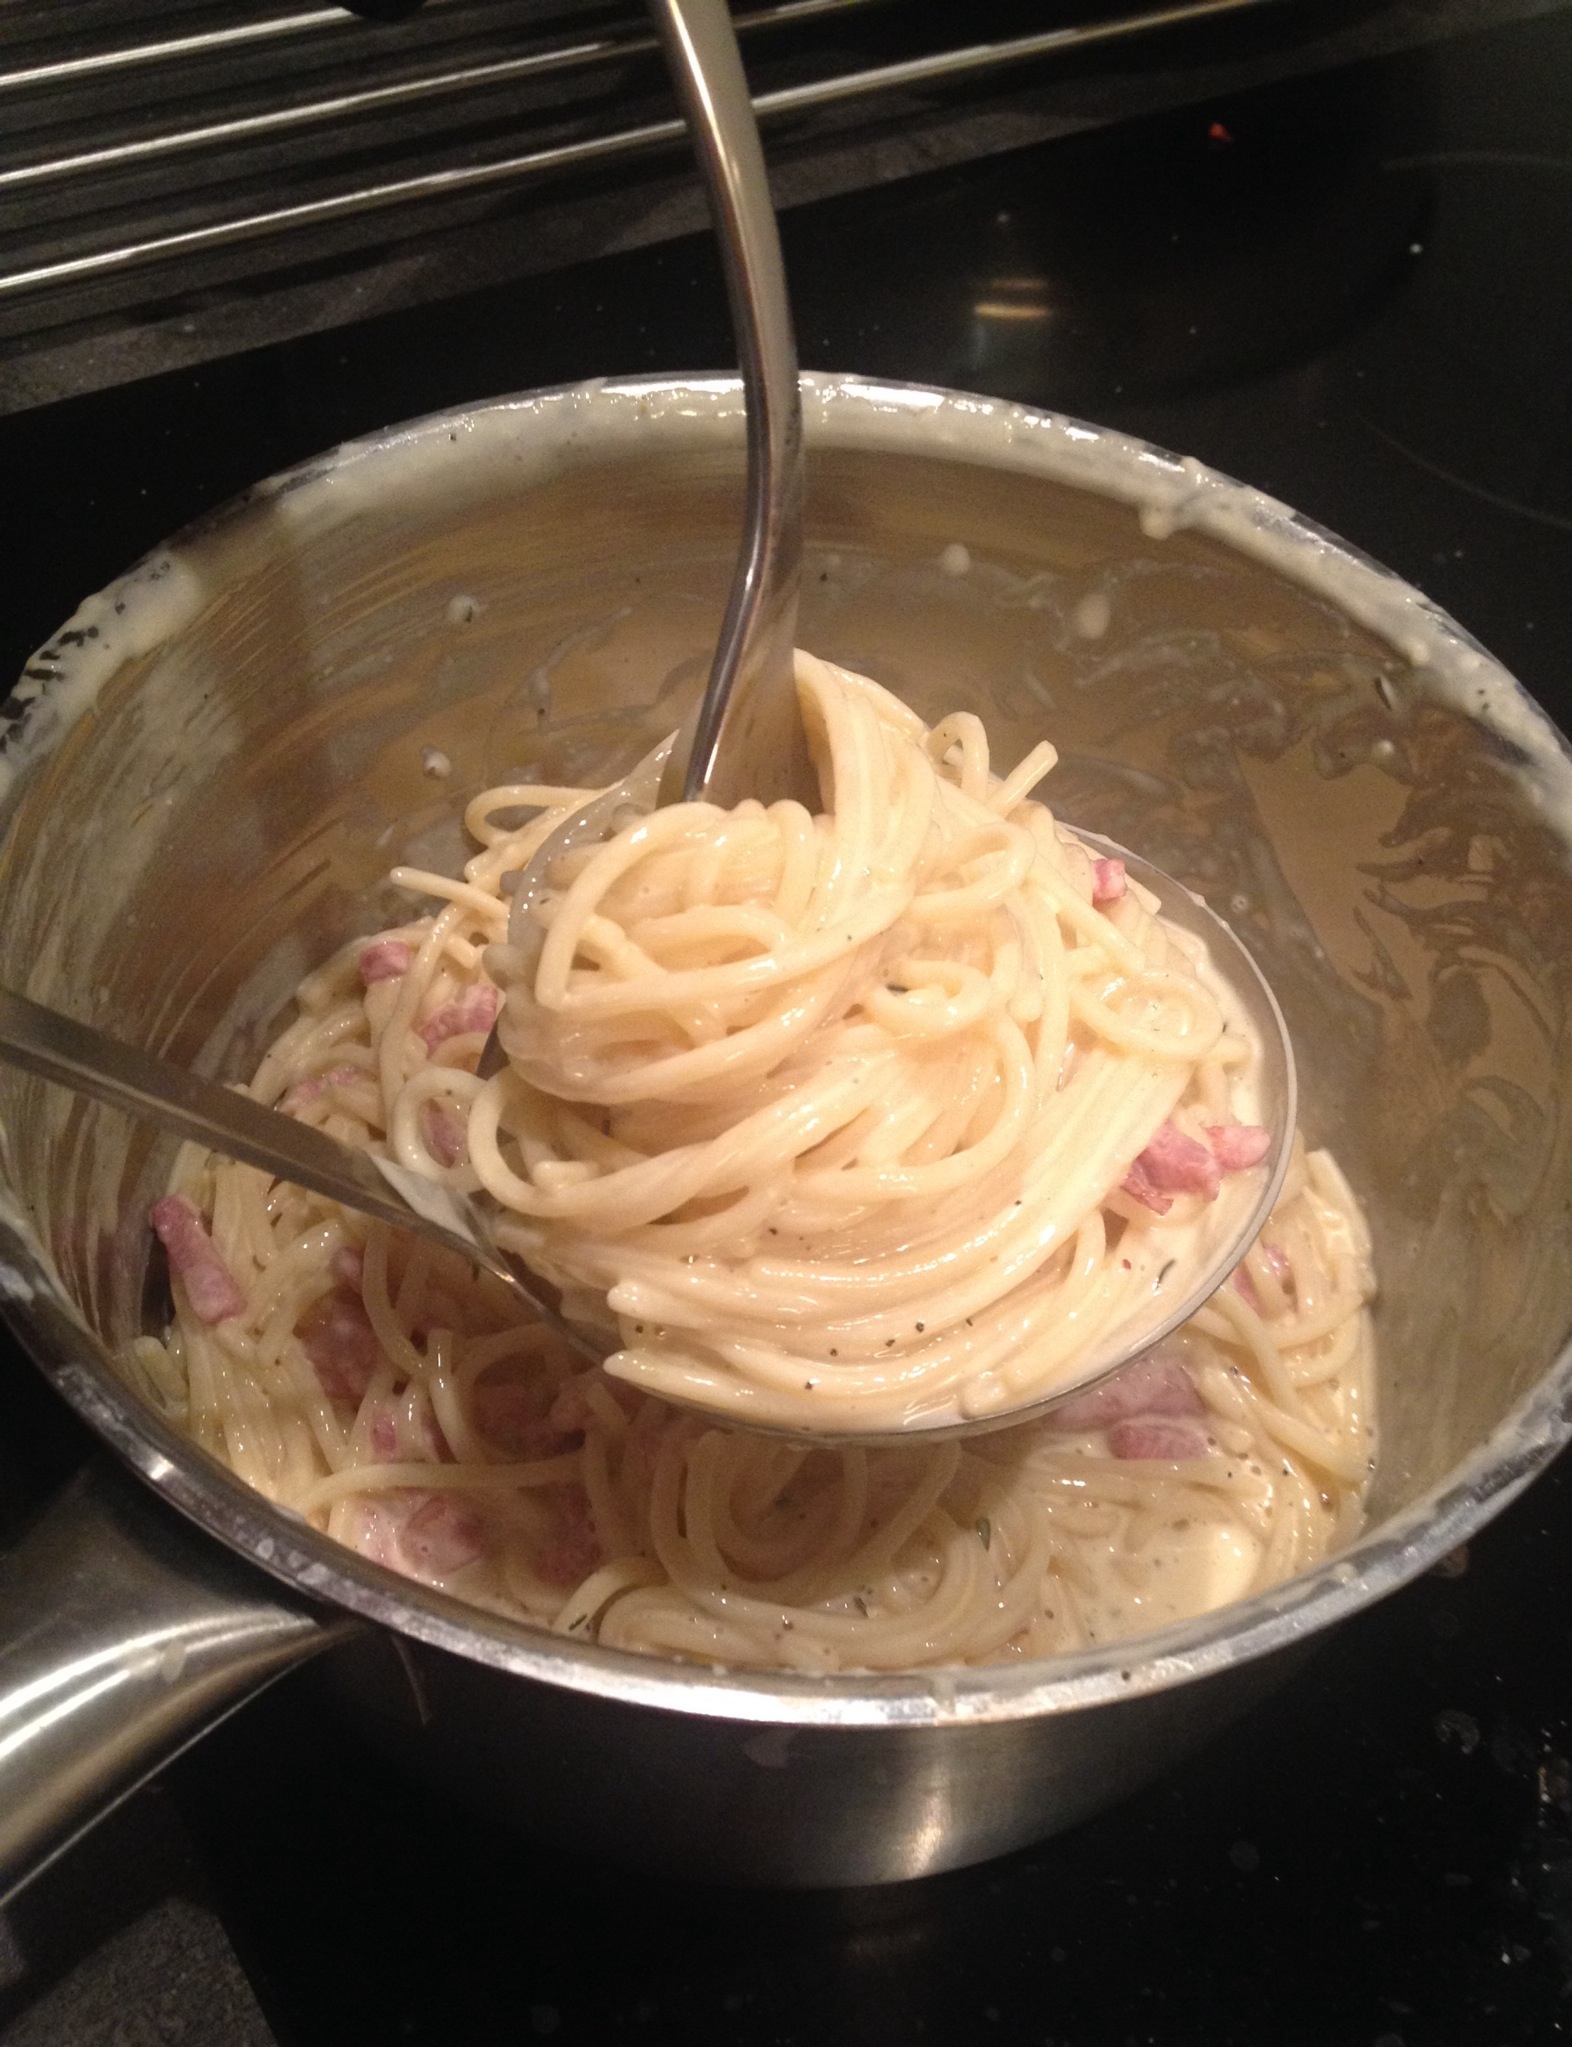
Keep the fork in the ladle and transfer the pasta from the pan to a warm deep pasta plate, slide the ladle out being careful to keep the height of the pasta.

Finish with grated Parmesan, basil and some of the lardons you kept from the sauce.

20131203-145711.jpg

Chicken and chorizo with crispy gnocchi. Basil, lemon and garlic infused cream.

Standard

This is a great dish if you have a few people for dinner, it’s fast with minimal prep and really tasty. There’s lots of possible variants with this so you can really experiment with different sauces and even possibly adding a side accompaniment. It has a bistro feel and is guaranteed to impress your diner, I usually start with insalata caprese and this dish follows nicely.

This recipe serves two generously with a starter.

INGREDIENTS

2 chicken breast fillets, trimmed
One chorizo sausage. Skinned and sliced down the middle, length ways
125 ml Single cream
Lemon wedge
300g of fresh potato gnocchi -pre made will do, I find it takes the same time in the pan because it’s already pre boiled
Hand full of fresh basil
2 cloves of garlic
Sea salt and fresh ground black pepper

METHOD

Pre heat fan assisted oven to 200 degrees

Heat a small sauce pan over a medium heat and pour in the cream, season the cream with salt and pepper.

Next top and tail the garlic and bash them with a wide knife on a board, discard the skin and add to the pan of cream.

Roll up 6 to 7 good sized basil leaves and slice into ribbons, add to the pan and give a quick squeeze of lemon and stir, turn the heat down just to keep warm and allow to infuse.
20131117-182213.jpg

Heat a large frying pan over a medium high heat and add the chorizo flat side down, no oil needed, let the chorizo release it’s oil in the pan. The chorizo will cook very fast so no more than a minute to minute and a half is necessary for a decent sear.

Flip the chorizo over once well coloured and cook for another minute, then wrap in foil and set aside.

Generously season the chicken with salt and pepper and place them in the same pan that cooked the chorizo, add a little oil and place over a medium high heat.

Sear well on both sides and then transfer to an oven proof dish, place on the middle oven shelf for 6 and a half to 7 minutes.

Wipe the pan with kitchen paper until it looks dry and place back on the heat, at this point give your cream a stir. The reason for wiping the pan is basically to remove the colour of the chorizo oil, orange gnocchi is not particularly attractive on the plate!

Add a knob of butter to the pan and straight away a drizzle of oil, this is to stop the butter burning.
Remove from the heat and roll the butter and oil around in the pan to combine.

Next add the gnocchi to the pan and season generously with salt and pepper, toss to coat in seasoning and oil.

Cook through and crisp the gnocchi on both sides by tossing regularly (for around 6 minutes)
20131117-190223.jpg

When the chicken has 2 and half minutes of cooking time left, place the foil wrapped chorizo on the same shelf next to the chicken to warm through.

Once the chicken is cooked remove it along with the chorizo from the oven and allow to rest for one minute, whilst the meat rests arrange the gnocchi in a circular shape in the centre of a warm plate.

Drizzle the cream around the outside of your gnocchi, try to allow the least amount of liquid to come into contact with the gnocchi so it’s stays nice and crispy.

Place the chicken in the centre, on top of your gnocchi and finally the chorizo on the chicken. I always find a plate with height is really inviting and afterwards thought some lightly dressed watercress on the chorizo would have been nice.

A quick squeeze of lemon on the chicken and chorizo and your finished!

20131117-191746.jpg

Perfect chicken breast fillet

Standard

Much more difficult than it sounds, I’m sure you’ll agree. Chicken dries out so quick, almost the same way as a chocolate fondant will solidify in the blink of an eye. The trick is to be very quick and very hot, but let’s not forget that it must be heated right the way through, I’ve never met anyone who orders their chicken medium rare!
It took me a long time to master this, to get it perfect and after reading this, you’ll have perfect chicken too.

INGREDIENTS

Chicken breast fillet, mine are around 1 inch thick, at the thickest point and are skinless.

Lemon wedge

Fresh thyme, or dried. Dried thyme and oregano are the king and queen of dried herbs and are still pretty potent when awakened in hot oil.

Salt and fresh ground pepper

Knob of butter

Generous glug of olive oil

METHOD

Take the chicken out of the fridge ten mins prior to cooking.

Place on a board and remove any fat whilst maintaining a good shape, season generously with salt, pepper, thyme on both sides.

20131107-195930.jpg
Pre heat oven to 200 degrees. (I have fan assisted oven)

Next heat a heavy bottomed pan with a knob of butter and a splash of olive oil, combine the two in the pan with a spatula. The butter gets a great crispy sear whilst the oil stops the butter from burning at high heat.

When the pan is smoking hot press your fillets down into the center of the pan, try to get every millimeter of the meat in contact with the pan. A quick, even sear will keep maximum moisture in the chicken.

2 minutes and 30 seconds on each side, keep them moving but don’t loose contact. Keep the pan very hot, as hot as you dare really.

Quickly transfer to an oven proof dish and place in the center oven for 6 minutes and 30 seconds, if your fillets are thicker you’ll need to adjust the time by another 30 seconds to 1 minute.

Once cooked transfer the chicken to a clean board an allow to rest for one minute, this is important for the meat to retain maximum moisture and also to finish it’s cooking process.

20131109-104737 am.jpg
Slice the breast diagonally from right to left so you see a good cross section of the meat and transfer to your plate.

Add a quick squeeze of lemon and your good to go.

20131109-105301 am.jpg